Mastering Race Wraps
Develop your skills and learn how to design motorsports wraps with precision and excellence!

What are users saying?

Mastering Race Wraps ($299.00)
This has been the best thing to purchase next will be, Mastering Illastrator and ill be ready just to get more familiar with Illastrator. I understand what Ray does in this but just how to otherthing and get used to the UI as a new comer coming from affinity I think mastering Illastrator and this go hand in hand and also the cutting out of a car all go together.
View this product →ron blake
2023-09-06 16:27:10 Mastering Race Wraps ($299.00)
I would personally recommend this to anyone that is skeptical. I designed in the sims community for 11 years and got into real designs 2 years ago. I was taught wrong on how to design real cars and that person ended up taking advantage of me. Now that I have the best of the best information to do it step by step, tips and tricks by Ray himself who I'll have the utmost respect for forever in helping me. Not many will share this information nor help, you can't go wrong here by no means and everyone here at SRGFX deserve a lot of credit and respect for what they do and the help they pour out. If you haven't purchased this program yet, I recommend getting it ASAP!
Thanks Ray and staff here at SRGFX, Top notch stuff with the best professional atmosphere and people that care. Thanks.
View this product →kevingarrard71
2017-01-29 00:05:46 Mastering Race Wraps ($299.00)
Defiantly recommend this course to anyone to buy! Well worth it! Ray has done a great job on creating this to help the community and make the racing design world better! Recommend if you aren't familiar with racing graphics industry to go get yourself the master adobe illustrator course firs then move on to this one! Once again great job Ray!
View this product →jberkley9@gmail.com
2015-12-01 09:02:25 Mastering Race Wraps ($299.00)
The tips and tricks were great! I also learned to maintain consistency and quality in my designs. It also has good tips on how to speed up the design process without sacrificing quality. I would recommend it to anyone looking to improve their skills.
View this product →David
2015-03-19 17:11:30 Mastering Race Wraps ($299.00)
This course is the best! I have learned so many shortcuts and tips. My designs have improved tremendously from when I started. I highly recommend this to anyone who would like to step up their game!
View this product →Josh
2015-03-19 11:01:24 Mastering Race Wraps ($299.00)
Even if you think there is nothing else you can learn about designing race wraps, take the course. There are so many details and tricks that would take years to pick up on, that you can learn in minutes. There's been moments while watching the videos where I feel like a complete fool for not already using the technique I'm watching. It's simple, but I would have never thought to do it until seeing it. Watching this course will most likely give you the ability to look at some of your design from the past, and just pick them apart piece by ugly piece. It will definitely make your design improve the minute you start the course.
View this product →thrillbillygraphics@rocketmail.com
2015-01-14 16:36:25 Mastering Race Wraps ($299.00)
It's a great course to see how others deal with the creative process of creating a wrap. I have learn quite a few shortcuts and ideas that I will use on all future project going forward. Thanks Ray keep bringing us these great products!
View this product →modman
2015-01-13 10:50:20
What is Mastering Race Wraps?
Mastering Race Wraps is a comprehensive 128-video lesson course that will walk the viewer through every step of designing race wraps. The course will cover two projects back-to-back
and detail the process along the way, from creating excellent numbers and sponsors to designing killer background graphics. Learn techniques and principles that will have you designing
race wraps on a professional level.
Never designed a race car before? While Mastering Race Wraps is not a difficult course, it is also not foundational. If you have no design experience, we recommend becoming familiar with some design tools common to most all design software before starting this course.
Again, this course will not teach the fundamentals of graphic design and design tools – it will focus on the principles and techniques of race wrap design. If you are looking for something more fundamental, we recommend our Mastering
Adobe Illustrator Course.
Course Details and Information
What’s included in the course videos

128 Video Lessons
Within these lessons we systematically break down two separate projects into steps, giving the viewer will gain a command of the information. Both projects are unique not just because they are two different race cars but because no two projects are ever alike; however, the design principles and techniques work for every type of race car wrap. In these lessons, we tackle the demands of each project while creating a stellar wrap design.

Over 30 Hours of Material
You read that right! We spared no detail, left no question unanswered. Over the course of the 30+ hours, we take our time and discuss in detail what it takes to create successful designs while addressing common mistakes that are made in the wrap design industry. A pro designer should never overlook even the smallest detail. These lessons will help you set a personal standard that will help you create client-pleasing wrap designs on a consistent basis.

Over 15 Time Saving Tips
Being creative is one thing, maximizing your time with good organization is another. Throughout the course we will shed light on some helpful practices that can save you loads of time per project. These tips relate to both your design and workflow. Properly managing project details digitally will help you keep your focus on what you need to be doing – DESIGNING. Eliminate time wasting practices from your workflow!

Over 125 Pro Tips
The techniques and practices used in wrap designs are no different than commercial graphic design, but what are the standards? What are the standards you design by? These pro tips will not only provide a guideline to professional design but will help elevate your level of performance to a professional standard. You have to understand the rules of fundamental graphic design to know when it’s okay to break them.
A Glimpse of the Systematic Design Process
Breaking down the 8 step design process
Step 1 Folder Setup and Asset Collection
Lessons: 2-5 & 51-52In this step we will setup and organize a project folder and collect all the assets (details on the design, logos, measurements, sponsors, etc.) provided by the client. Once all the information/files are collected, we will place them in their respective folders within the project folder.
Step 2 Template Setup & Measurements
Lessons: 6-9 & 54-57In this step we will create accurately sized body panels from the measurements provided by the client. We will also setup the safe zone, which is the outermost edge that we can place sponsor and number elements before we run the risk of the elements going off the side of the car. We will also discuss color schemes and set body panel colors.
Step 3 Number Design & Creation
Lessons: 11-18 & 58-66In this step we will modify numbers from existing fonts and also learn to create numbers from scratch. We will also properly break down number outlines, create consistent gaps between numbers, and review the dos and don’ts of styling numbers.
Step 4 Sponsor Design & Creation
Lessons: 19-27 & 67-83In this step we will create unique sponsor logos quickly and easily. We will also discuss the importance of the primary sponsor, its prominence and relationship to the car number. This step will also include how to properly setup a contingency stack and a contingency row.
Step 5 Proximity & Alignment
Lessons: 28-33 & 84-88This step is probably the most important one of the entire design process. We will align each element properly to the edge of the car and create consistent spacing between the sponsors and numbers. This is where you can really set your designs apart and exemplify that standard of professionalism.
Step 6 Designing and Creating Graphics
Lessons: 35-44 & 90-114In this step we will create graphics from scratch. We will also talk about styling and detailing graphics. During this step we will create five completely different styles of graphics and discuss the importance of being able to create both simple and complex graphics
Step 7 Creating Final Details
Lessons: 45-47 & 115-123In this step we will add the final details to each of the design elements, including drop shadows, final outlines, and more subtle finishing touches that will take your designs to a whole other level
Step 8 Proofing and Print Setup
Lessons: 48-50 & 124-128In this step we will email the client a proof of the design and talk about the importance of professional email and client communication. We will also setup independent print-ready files that include all of the design elements from the project
![]()
Who is this course for?
This is NOT a beginner course. What we consider a beginner is someone who has zero experience with graphic design.
If you are completey unfamiliar with designing graphics, this course is not the place to start. This course will NOT
teach you how to use design software. This course is technique and principle driven specifically in the niche of designing wraps and
race cars.
This course was created in Adobe Illustrator, a vector-based design software; however, this course is not Adobe Illustrator specific. Because
the course is driven by design principles and technique, you will be able to follow along with most major vector-based design software.
![]()
If you have no experience designing race cars but need to get familiar with some graphic design tools first, we recommend taking our first course
Master Adobe Illustrator. You can find more information on that below.
Concepts you should know
If you are not familiar with the following concepts and are unsure how to achieve them, you may need to take our beginner course first.
- Creating outlines on shapes/text
- Creating outlines set to the inside of shapes/text
- Creating outlines set to the outside of shapes/text
- A basic understanding of the pen tool
- Moving single points
- Cutting and knocking out vector paths
- Setting gradient colors
- Creating patterns
- Basic Math

Each lesson comes with an interactive comments and questions area where you can ask the instructor questions and discuss your progress.
Think you might get stuck? Concerned you might not understand a design concept or technique?
You will have direct personal access to the instructor himself. Upload photos of your work and ask for feedback.
You will have personal help to guide you through the course. You can also contact the instuctor privately through the course lessons.


- Important Design Increments
- Pro Tips with Extras
- Time Savers with Extras
- 10 Number Breakdowns
- Professional Canned Emails
- Wrap Installation Instruction Letter
- Course Information
- Commercial Free Font List
- Premium Font List
- Clip Art Links
- And More…
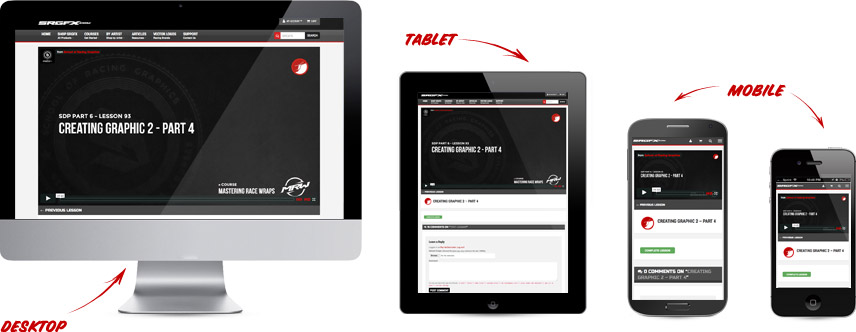
Easy Lesson Access
Accessible on any device, anytime, anywhere with an internet connection
Frequently Asked Questions
Common questions. Please check here before contacting us.
How do I get access to the course?
Once you have successfully purchased the course it will be in your account for viewing immediately. You can access the course at any time and from anywhere that has an internet connection. The course is formatted to be viewed on desktop, laptop, tablet, and smart phone devices.
How long will I have access to the course?
Forever. The course will be in your account indefinitely. The only way to lose the course is if you permanently shut down your account. You can watch each video as little or as often as you like at your leisure.
What if I want a hard copy?
For now, there will be no hard copies available.
What software do I need to take this course?
The course was created in Adobe Illustrator, but the course is not software tool driven. The Mastering Race Wrap course is about design technique and principles. You can use any major vector-based design software to take this course. Our recommendation is that
you are familiar enough with the tools in your design software that you know how to acheive basic design steps.
The following programs will work with this course: Adobe Illustrator, Corel Draw, Flexi Sign, Inkscape (FREE), Sign Blazer.

Meet the course instructor
Ray’s experience in racing graphics began long before he sat behind a computer screen.
Growing up in upstate New York with a father who raced and a mother who hand-painted race cars,
Ray took a keen interest in race cars, both inside and out.
He even enjoyed a short racing career himself during his young adult years in rural Wisconsin.
Picking up skills from his artistic mother, Ray has been hand drawing and painting from a young age,
but he began his digital design journey in 2003. He started recreationally, creating racing graphics for the sim racing community. However, this developed into freelance designing race wraps while being employeed full-time at an offset press print shop. Eventually,
the press job fell by the wayside as freelance design took off. Ray’s reputation as a talented race car designer spread, and he was
inspired to create SRGFX.com to share his techniques with other designers with a passion for racing graphics.
The Mastering Race Wraps course will include pro tips, time savers, and resources that will help take your design process and wrap designs to another level.
SRGFX Founder
RAY VANDERLINDEN

Full List of Course Lessons
- 1. Introduction
- 2. Project Folder Setup
- 3. Collecting Wrap Information
- 4. Collecting Wrap Assets
- 5. Collecting & Organizing Wrap Assets
- 6. Creating Accurate Body Panels P1
- 7. Creating Accurate Body Panels P2
- 8. Setting up the Safe Zone
- 9. Setting Panel Colors & Color Themes
- 10. Collecting Number Assets
- 11. Creating Numbers P1
- 12. Creating Numbers P2
- 13. Number Breakdown 1
- 14. Number Breakdown 2
- 15. Number Breakdown 3
- 16. Number Breakdown 4
- 18. Number Placement
- 19. Creating the Primary Sponsor P1
- 20. Creating the Primary Sponsor P2
- 21. Creating the Secondary Sponsor P1
- 22. Creating the Secondary Sponsor P2
- 23. Creating the Secondary Sponsor P3
- 24. Creating the Secondary Sponsor P4
- 25. Collecting Contingencies
- 26. Creating a Contingency Stack
- 27. Placing Final Sponsors
- 28. Alignment, Size & Space P1
- 29. Alignment, Size & Space P2
- 30. Alignment, Size & Space P3
- 31. Alignment, Size & Space P4
- 32. Alignment, Size & Space P5
- 33. Alignment, Size & Space P6
- 34. Clean Up & Create Mask
- 35. Creating Graphic 1 P1
- 36. Creating Graphic 1 P2
- 37. Creating Graphic 1 P3
- 38. Creating Graphic 1 P4
- 39. Creating Graphic 1 P5
- 40. Creating Graphic 1 P6
- 41. Creating Graphic 1 P7
- 42. Creating Graphic 1 P8
- 43. Creating Graphic 1 P9
- 44. Creating Graphic 1 P10
- 45. Creating Outer Shadows
- 46. Creating Inner Shadows & Outlines
- 47. Optional Details
- 48. Prepare & Send Initial Proof
- 49. Preparing Files for Print P1
- 50. Preparing Files for Print P2
- 51. Project Folder Setup
- 52. Collecting Wrap Information
- 53. Creating Accurate Body Panels P1
- 54. Creating Accurate Body Panels P2
- 55. Creating Accurate Body Panels P3
- 57. Setting Panel Colors
- 58. Hand Drawing Numbers P1
- 59. Hand Drawing Numbers P2
- 60. Hand Drawing Numbers P3
- 61. Hand Drawing Numbers P4
- 62. Vector Hand Drawn Numbers P1
- 63. Vector Hand Drawn Numbers P2
- 64. Vector Hand Drawn Numbers P3
- 65. Vector Hand Drawn Numbers P4
- 66. Number Breakdown 1
- 67. Creating the Secondary Sponsor P1
- 68. Creating the Secondary Sponsor P2
- 69. Creating the Secondary Sponsor P3
- 70. Creating the Secondary Sponsor P4
- 71. Creating the Secondary Sponsor P5
- 72. Creating the Secondary Sponsor P1
- 73. Creating the Secondary Sponsor P2
- 74. Creating the Secondary Sponsor P3
- 75. Creating Misc Sponsors P1
- 76. Creating Misc Sponsors P2
- 77. Creating Misc Sponsors P3
- 78. Creating Misc Sponsors P4
- 79. Creating Misc Sponsors P5
- 80. Collecting Contingencies
- 81. Creating a Contingency Row
- 82. Placing Final Sponsors P1
- 83. Placing Final Sponsors P2
- 84. Alignment, Size & Space P1
- 85. Alignment, Size & Space P2
- 86. Alignment, Size & Space P3
- 87. Alignment, Size & Space P4
- 88. Alignment, Size & Space P5
- 89. Clean Up & Create Mask
- 90. Creating Graphic 2 P1
- 91. Creating Graphic 2 P2
- 92. Creating Graphic 2 P3
- 93. Creating Graphic 2 P4
- 94. Creating Graphic 2 P5
- 95. Creating Graphic 2 P6
- 96. Creating Graphic 3 P1
- 97. Creating Graphic 3 P2
- 98. Creating Graphic 3 P3
- 99. Creating Graphic 3 P4
- 100. Creating Graphic 3 P5
- 101. Creating Graphic 4 P1
- 102. Creating Graphic 4 P2
- 103. Creating Graphic 4 P3
- 104. Creating Graphic 4 P4
- 105. Creating Graphic 4 P5
- 106. Creating Graphic 4 P6
- 107. Creating Graphic 4 P7
- 108. Creating Graphic 5 P1
- 109. Creating Graphic 5 P2
- 110. Creating Graphic 5 P3
- 111. Creating Graphic 5 P4
- 112. Creating Graphic 5 P5
- 113. Creating Graphic 5 P6
- 114. Creating Graphic 5 P7
- 115. Optional Details P1
- 116. Optional Details P2
- 117. Optional Details P3
- 118. Optional Details P4
- 119. Optional Details P5
- 120. Optional Details P6
- 121. Optional Details P7
- 122. Optional Details P8
- 123. Optional Details P9
- 124. Prepare & Send Initial Proof
- 125. Setting up the Print Files P1
- 126. Setting up the Print Files P2
- 127. Setting up the Print Files P3
- 128. Final Thoughts